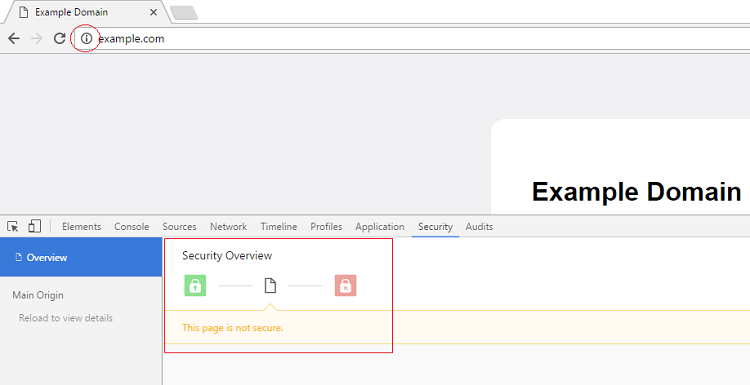
Google Chrome has already started to flag non-HTTPS as “This page is not secure.” In Chrome Version 53.0.2785.116m icon shows ¡ (inverted exclamation mark) for non-HTTPS pages as shown below. So right now every webmaster is moving to HTTPS by installing SSL on servers. Installing SSL requires server knowledge and coding if you are on VPS hosting.
Some of the Pros of SSL/HTTPS (Why we need SSL/HTTPS Pages?)
- Google Ranking Signal – HTTPS is now a ranking signal. link
- Trust – Visitor trust a website if it has SSL certificate
- Encryption – You can send sensitive information to the right recipient. For example Credit card details, login details, password etc.
- Future Proof – From 2017 Chrome will flag non-HTTPS pages as non-secure.
Cons of SSL/HTTPS pages. (Not Anymore)
- Cost – You need to buy SSL certificate which cost from pennies to thousand of dollars depending upon requirements but for the normal use you can get it for free.
- Performance – Encryption takes server resources and thus reduces performance. HTTPS pages take slightly more time to load then non-HTTPS page. But this can be overcome by using good hosting.
Myth About SSL – Some hosting company now says you can’t install SSL without a dedicated IP address, Or you can’t install SSL at all. The truth is SSL can be installed without buying dedicated IP address, this can be achieved using a special extension called as SNI (Server Name Indication) since all browser now supports SNI.
Tutorial to Install Free SSL on WordPress Website with Let’s Encrypt
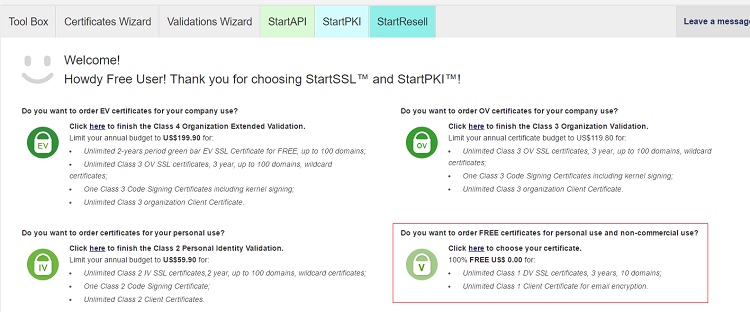
I will be using Let’s Encrypt (StartSSL provides Let’s Encrypt free SSL certificates) a free certificate authority which provides free SSL certificate, Cpanel hosting, WordPress website and a domain on which SSL needs to be installed.
- Goto StartSSL https://www.startssl.com/ Signup, enter password and then download the login certificate. (Login certificate will allow to login to StartSSL using a certificate). See Image
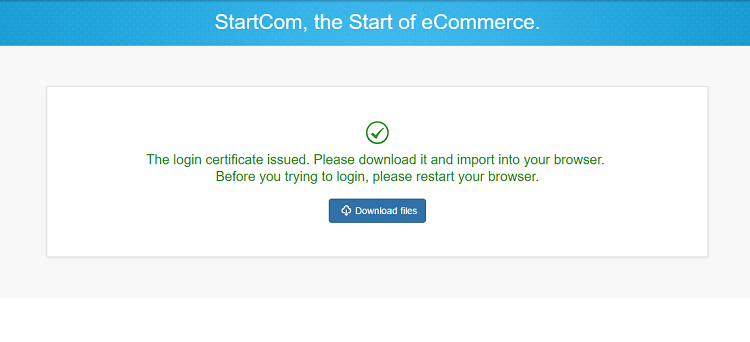
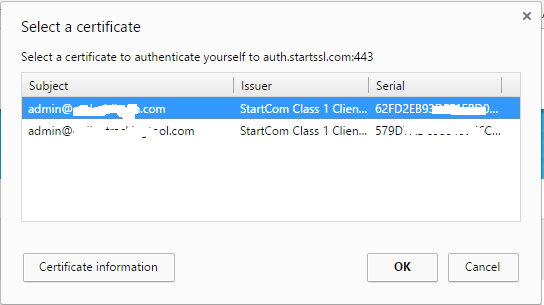
- Click the downloaded login certificate and install it, enter the password you specified in previous step. Click on Client Certificate Login then Chrome will ask to select the email address/Certificate which you downloaded in thee previous step.
- Restart Chrome, and then goto StartSSL login https://www.startssl.com/Account.
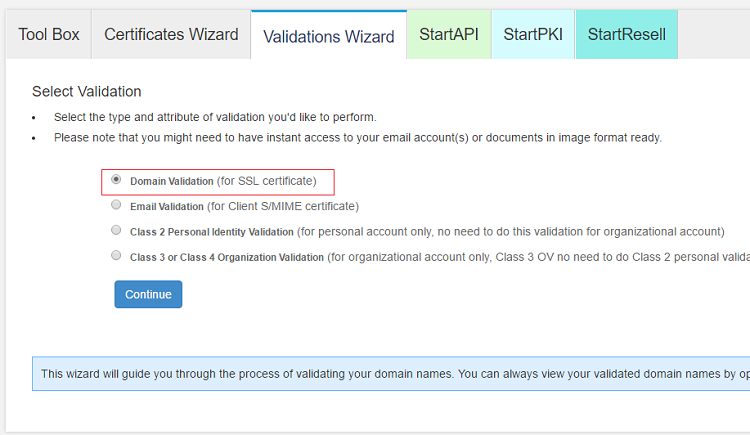
- After login goto Validation Wizard, select Domain Validation (for SSL certificate) click continue.
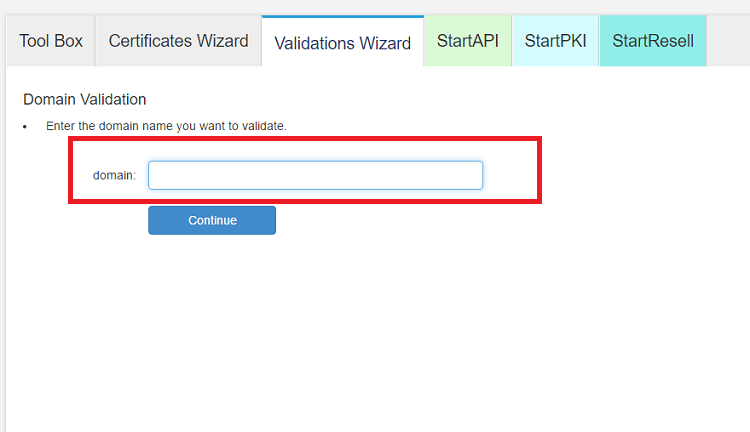
- Enter domain name on which you need to install SSL and it will search for whois information and click continue.
- Select Email ID to receive the verification code. (You need to verify that you own that domain. If you don’t have access to any of the domain then create a new mail account).
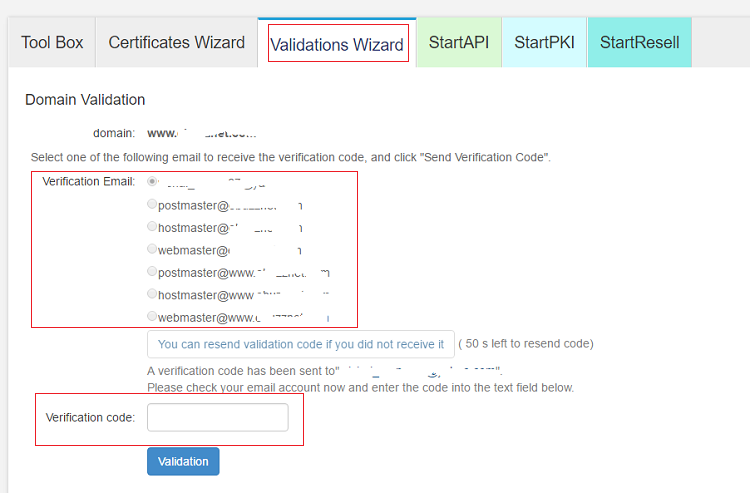
- Enter Validation code and hit validation button. You will receive below success message.
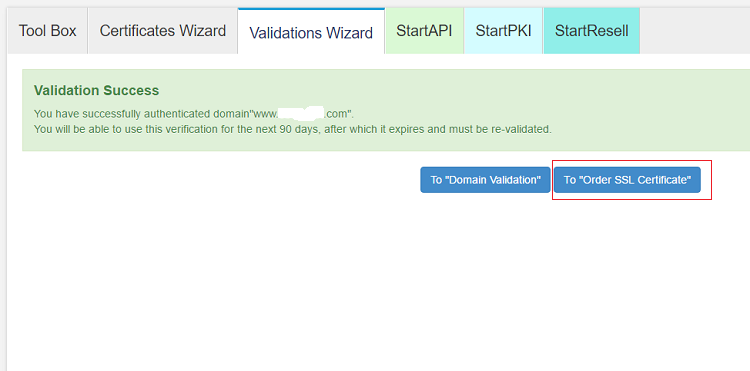
- Click on “To Order SSL Certificate ” or goto Certification Wizard and enter your domain name (Hostname) for example enter www.appdazzle.net and appdazzle.net on the separate line. If your site name is example.com then enter example.com on first line and then www.example.com on second line.
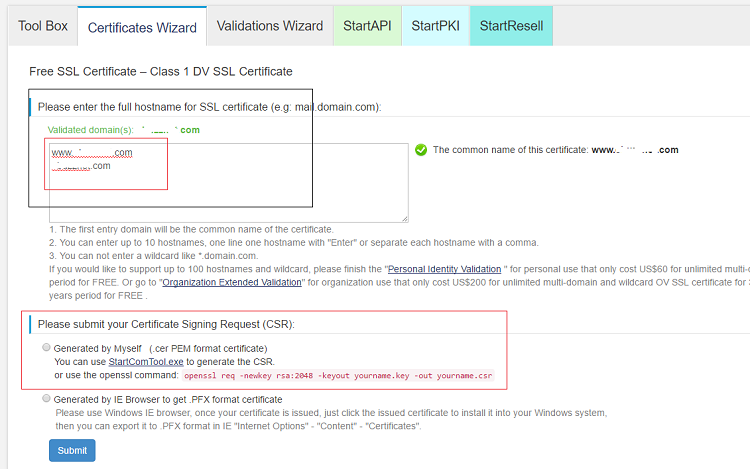
- On Please submit your Certificate Signing Request (CSR) select Generated by Myself (.cer PEM format certificate). (*Needs to be filled with CSR generated)
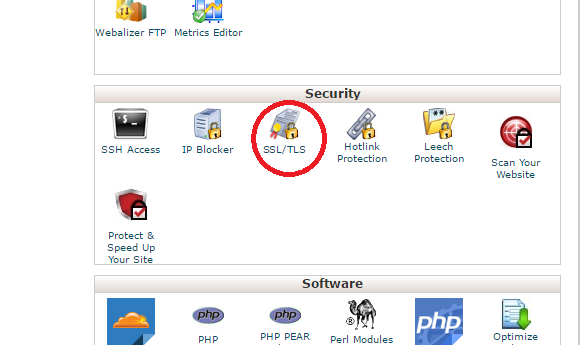
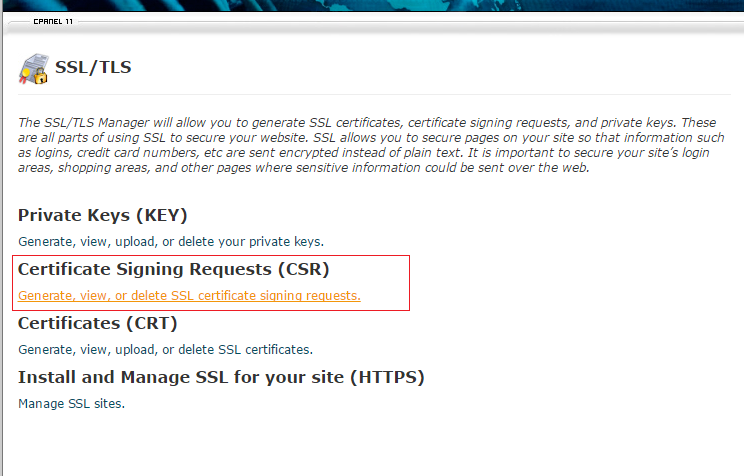
- Goto Cpanel of your hosting where you need to install SSL. Under security section, Select SSL/TLS and click Generate, view, or delete SSL certificate signing requests under Certificate Signing Requests (CSR).
- Fill out all the details and hit generate. Cpanel will generate Encoded Certificate Signing Request CSR,

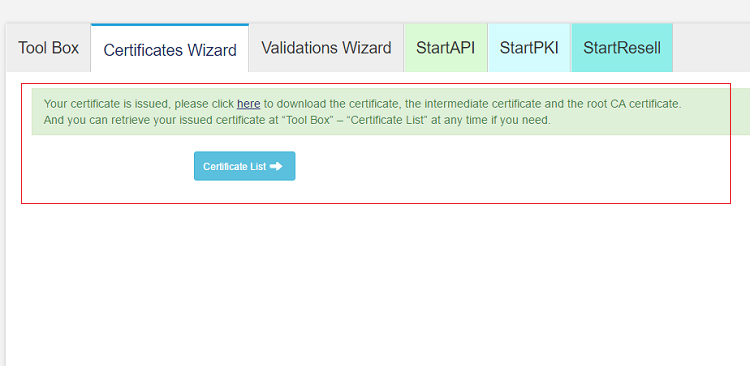
- Paste Generated CSR in StartSSL under “Please submit your Certificate Signing Request (CSR)” and hit submit. You will get following message, from there you can download your SSL certificate or goto https://startssl.com/CertList to download your SSL certificate.
- Open the zip file, select server type Apache in most cases (you need to find this file www.example.com.crt file) Open it using text editor (NotePad) and copy everything. Sample Certificate is shown below.

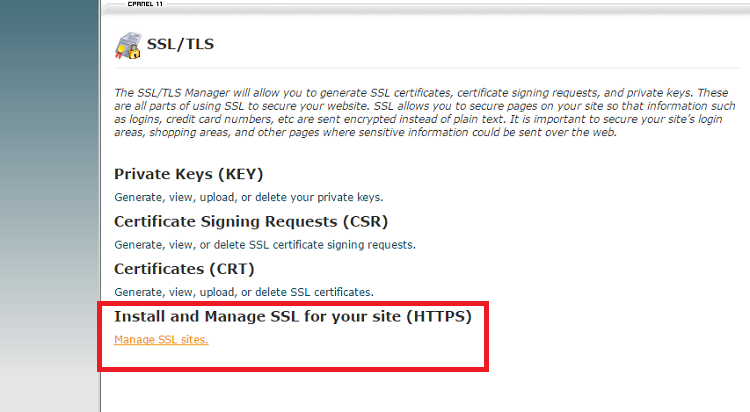
- Now Go back to your hosting Cpanel -> SSL/TLS and then select Manage SSL sites under Install and Manage SSL for your site (HTTPS)
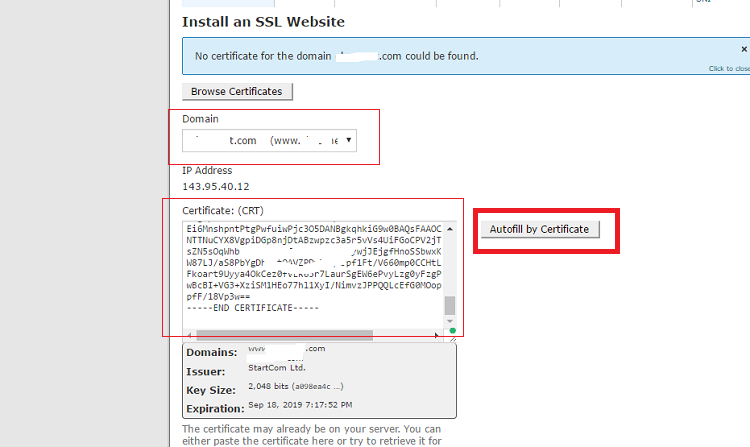
- Select domain on which SSL needs to be installed, paste the Certificate: (CRT) file which you copied before and click Autofill by Certificate. It will automatically fill Private Key (KEY) and Certificate Authority Bundle: (CABUNDLE).
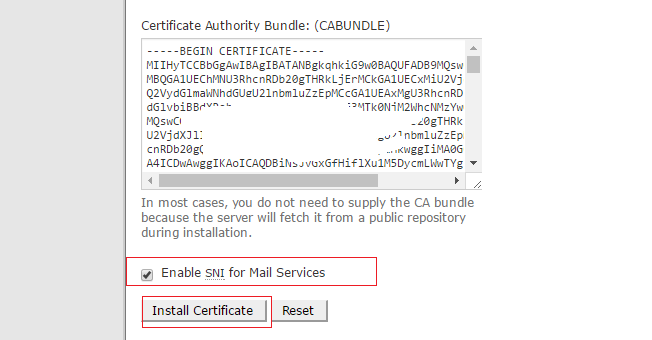
- Check the Enable SNI for Mail Services and click on Install Certificate. SSL will be installed on your server and you will get SSL Host Successfully Installed. You can check SSL by visiting your website URL by adding HTTPS on the domain.
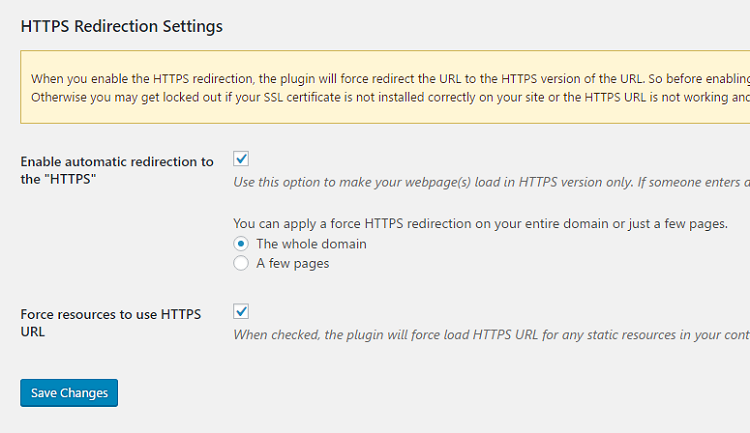
To serve each and every URL of your website using HTTPS protocol you need to install a WordPress Plugin called as Easy HTTPS (SSL) Redirection which helps in serving secure content and gives your website pages green padlock. In plugin setting check all the settings shown in the picture below.
If you face any problem while installing Free SSL on WordPress Website with Let’s Encrypt, feel free to comment your questions and suggestion below.
